

Creating, Editing & Submitting Expenses with TravelBank
You may be wondering how to capture expenses with TravelBank. We have made business expense tracking with TravelBank as easy as possible, in order to save you from the stress and time it used to take to submit your expenses each month!
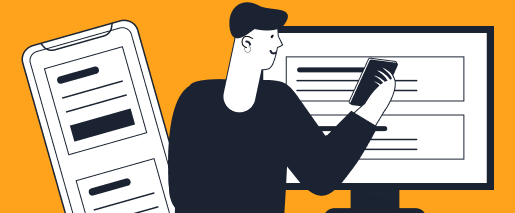
There are a few simple ways to start adding an expense in the TravelBank app:
- Take a photo of a receipt using our mobile app
- Forward an email receipt to TravelBank
- Upload a saved receipt image to a report
- Import transactions with credit card sync
Pro Tip: If you book travel via the TravelBank app all receipts and expenses will automatically be added to your expense report!
Taking a Photo of a Receipt
Take a photo of a receipt using our mobile app and enter the amount — our receipt-scanning technology will pick up key details and auto import the expense for you.
Capturing an Email Receipt
You can forward both PDF attachments and email receipts to TravelBank and they will land in your expenses list where you can assign it to a report.
Receipt Forwarding From Your Company Email Address
If you are already set up on TravelBank, your company email address (the one you signed up with) is linked to your account, and you simply need to forward the receipt to receipts@travelbank.com.
Receipt Forwarding From Your Other Email Addresses
Maybe you have Uber linked up to your personal email account, or you order something on Amazon.com for business use. We understand that sometimes receipts incurred for business expenses are sent to a different email.
Your personalized email address for sending receipts from your any email inbox to TravelBank is based on the email address you used to sign up with TravelBank: “email+domain@receipts.travelbank.com”.
For example, if Taylor Brien received a receipt for a business expense that was sent to her personal email, she can still send it to TravelBank. If Taylor’s work email is taylor.brien@vomo.com, Taylor would forward the receipt to taylor.brien+vomo.com@receipts.travelbank.com from whatever email she wishes, or have receipts auto forward from that address in services like Uber and Amazon.
NOTE: Lyft requires you confirm your email so this email forwarding won’t work. You will need to forwards the receipts from your personal email to your work email, and then from your work email forward them along to receipts@travelbank.com.
Uploading Photo Receipts
Need to add a saved receipt image to a report? If you have a photo receipt saved and need to upload it to TravelBank on either the mobile or desktop app, just tap the + icon found on the expense list and then Upload Photo. Once you have selected the photo you wish to upload you can either manually enter the expense details or let our receipt scanning technology do the leg work for you!
Credit Card Sync
Credit card sync allows you to pull credit card transactions directly into your expense reports. For those that don’t travel often, you can add a credit card and toggle on and off the sync only when you know you’re going to be using it for business. You can learn more about setting up this feature in this post.
Editing Expenses
Regardless of how you captured an expense and added it to an expense report in TravelBank, you can always go back and edit the details of your expenses with just a couple of clicks. The videos below show you how to edit an expense on your mobile app or via our desktop app.
Via the Mobile App
If you’re always on the go, then you’ll want to watch this tutorial on how to quickly and easily submit expenses and receipts with our mobile app.
On Desktop
If you prefer doing your expenses on your work computer then check out this video on how to seamlessly edit and submit receipts through our desktop app.
Submitting Expense Reports
When you are ready, you can submit your expense report with one tap. Tapping Submit will automatically generate a PDF of your expense list and send a copy to your work email. If your company is using TravelBank, your expense report will also be routed to your department manager for approval. Your finance team can even reimburse you via direct deposit using TravelBank.